# Use Contabo Object Storage with NodeJS
Hi there! 👋
Recently, [Contabo](https://contabo.com/en/) launched their new storage solution [Object Storage](https://contabo.com/en/object-storage/). These object storages provide an S3 compatible API and can be used quite easily - in this post, I show you how.
*You can find the full source code for both NodeJS and Python3/Flask [at the bottom](#heading-full-code).*
## Get your Object Storage
To follow along, you first need your own Object Storage. You can [go directly to Contabo and order your Object Storage now](https://contabo.com/en/object-storage/order/). After you've completed the purchase, you can log in to your [customer panel and select "Object Storage" in the sidebar](https://my.contabo.com/object_storage). If you've never done this before, you'll be asked to set a password for the Object Storage Panel. After you've set your password, you can log in to the [Object Storage Panel](https://new.contabo.com/) with your Contabo Email and the newly set password.
Now navigate to "Storage" - "Object Storage (Buckets)" in the sidebar and you should see your new Object Storage. Perfect!
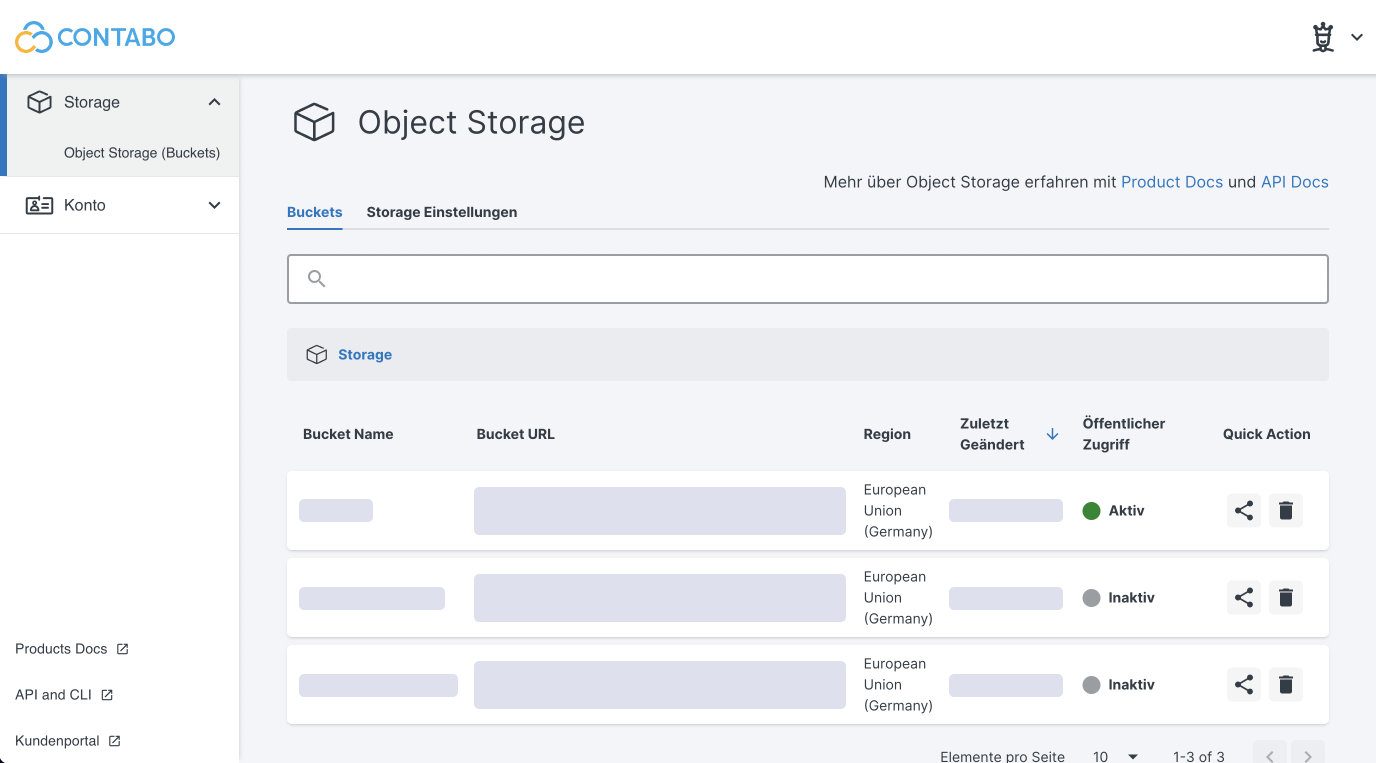
*I didn't find an option to change the language in this panel, so everything is in german, I'm sorry :(*
## Create a bucket
Your files are organized in buckets, so let's create our first bucket. Below your Object Storage in the Object Storage Panel is a button to create a new bucket.
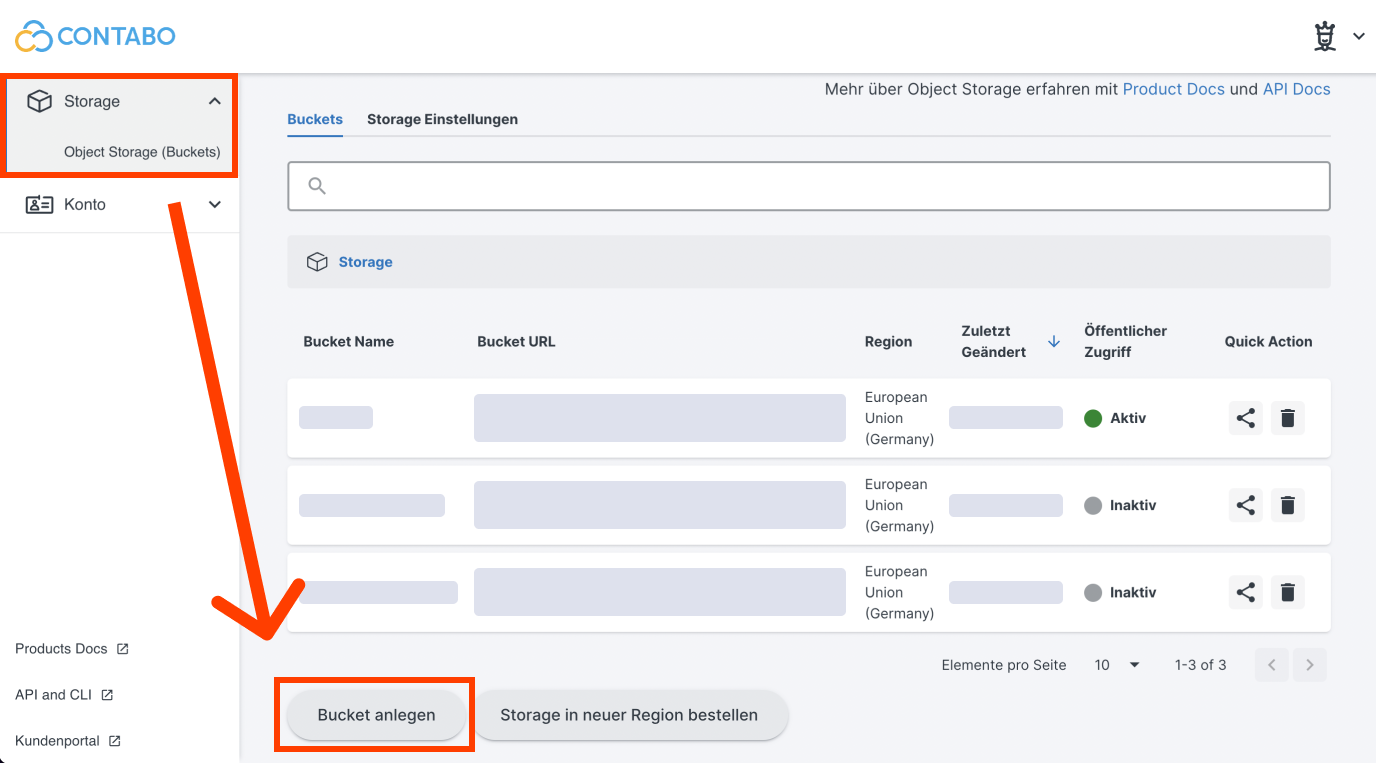
Now name your bucket and choose a region where your bucket should be located. Create it and you should see your new bucket on the list.
## Get the access keys
To connect with the S3 API of your storage, we need two keys to authenticate:
1. The `Access Key` and
2. the `Secret Key`.
You can generate them in the Object Storage Panel by navigating to ["Account" - "Security and access"](https://new.contabo.com/account/security). Scroll down to the section "S3 Object Storage". That's where you can see both tokens. If you don't, click "Regenerate secret key" to create a new secret key.
We'll need both keys later when connecting to the S3 API.
## Setting up NodeJS and Express
For this example, I'll build a simple webserver with [ExpressJS](https://expressjs.com/) to handle file uploads and also return all currently stored files.
Open up a new folder and initialize a new npm project. We also need `express` for our webserver and `aws-sdk` to interact with the S3 API, so we install them too:
```bash
npm init -y
npm i express aws-sdk
```
To get started we first need the webserver, so let's start express:
```js
// index.js
const express = require("express")
const AWS = require("aws-sdk")
const app = express()
/*
* Code goes here
*/
app.listen(4000, function() {
console.log("🚀 App is running on http://localhost:4000")
})
```
## Create the routes
For this simple project we need 3 routes:
1. `GET /`: The form to upload a file to our express server
2. `POST /upload`: The form handler to upload the file to the storage bucket
3. `GET /list`: A list of all files inside the storage bucket
### Show the form
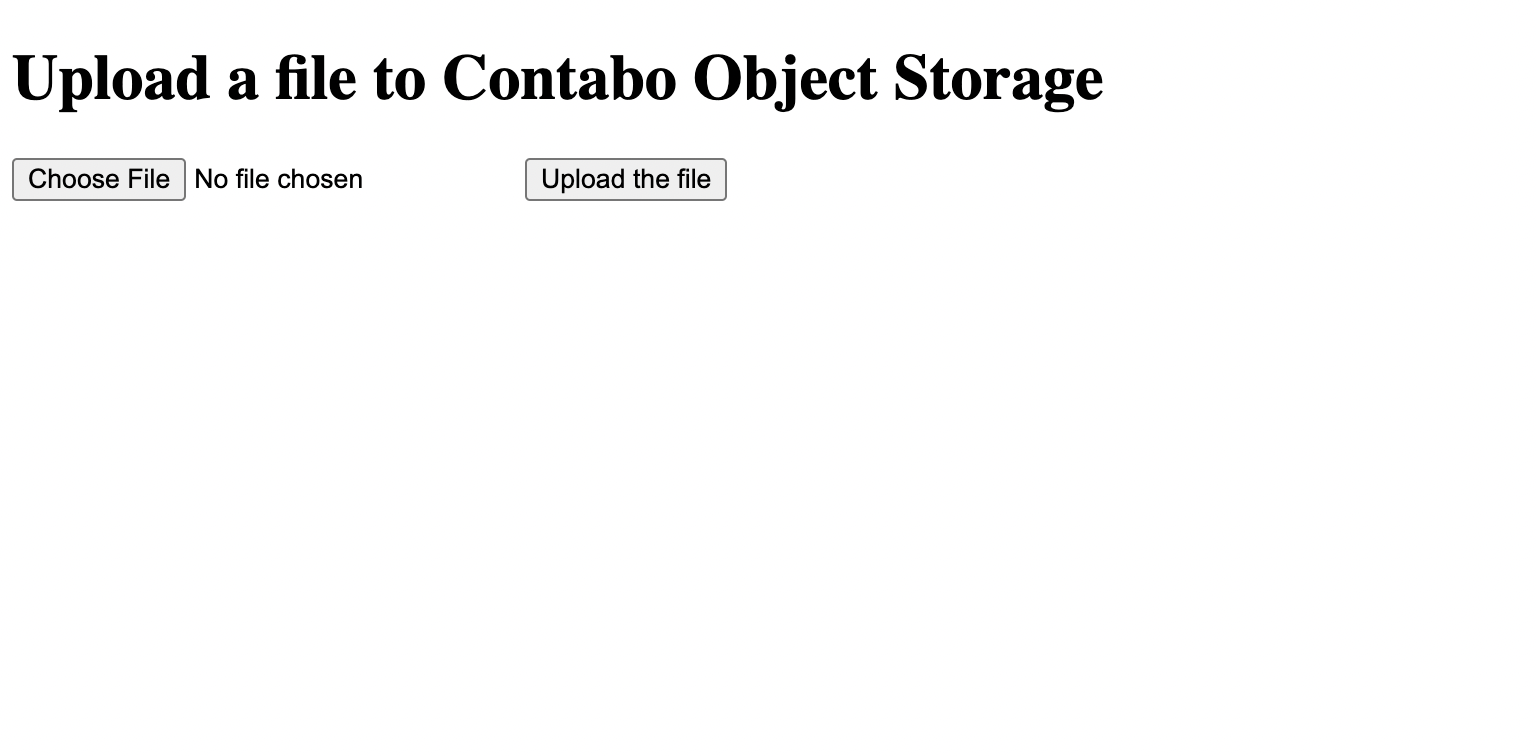
Well, before we can show a form, we first need a form. For this demo, I just created a quick HTML page `form.html` with a simple form on it to upload a file. Notice the form action `/upload`, this points to the route handling the file upload, and also the method `post`.
```html
File Upload
Upload a file to Contabo Object Storage
```
All we have left to do is use express to send the file on each GET request to the root path:
```js
// Show the form
app.get("/", function(request, response) {
response.sendFile(__dirname + "/form.html") // <- Point this to your HTML file containing the form
})
```
Done! You can test it by running `node index.js` to start the express server and open `http://localhost:4000` in your browser. You should see the form.
### Handle the file upload
To handle the file upload, we need the `express-fileupload` package to parse incoming `multipart/form-data` requests and extract the files:
```bash
npm i express-fileupload
```
And of course import it at the top of our `index.js` file:
```js
const express = require("express")
const AWS = require("aws-sdk")
const fileUpload = require('express-fileupload') // NEW
```
Express-Fileupload is a middleware, so we need to register it to our express app:
```js
const app = express()
// Middleware to handle incoming files
app.use(fileUpload({
createParentPath: true
}))
```
In the next step, we create the actual route to handle the POST request with the file to upload:
```js
// Handle files
app.post("/upload", function(request, response) {
const file = request?.files?.["fileToUpload"] || null
// Return if the request doesn't contain the file
if(!file) return response.sendStatus(400)
/*
* TODO Upload the file to the storage bucket
*/
response.sendStatus(200)
})
```
### Connect to the S3 API
Things are getting real, we'll now connect to the S3 API to interact with our storage bucket!
Right after we create the express app by calling `express()`, let's create the connection to the S3 API:
```js
const app = express()
// Connect to S3
const s3 = new AWS.S3({
endpoint: `contabo_storage_bucket_url`, // e.g. https://eu2.contabostorage.com/bucketname
accessKeyId: "your_access_key_here",
secretAccessKey: "your_secret_key_here",
s3BucketEndpoint: true,
});
```
We can now use all the S3 functions with our new `s3` variable.
### Upload the file
Back in our `POST /upload` route, we need to parse the data from the file:
```js
// inside POST /upload route
const file = request?.files?.["fileToUpload"] || null
// Return if the request doesn't contain the file
if(!file) return response.sendStatus(400)
// Destructure the content of the file object
const { name, mimetype, size, data } = file
const fileContent = Buffer.from(data, ' ');
```
We can now call the `s3.putObject` function to upload a file to the storage bucket.
```js
// Handle files
app.post("/upload", function(request, response) {
const file = request?.files?.["fileToUpload"] || null
// Return if the request doesn't contain the file
if(!file) return response.sendStatus(400)
// Destructure the content of the file object
const { name, mimetype, size, data } = file
const fileContent = Buffer.from(data, ' ');
/* Add security checks (e.g. max size) here */
s3.putObject({
Body: fileContent, // The actual file content
Bucket: "bucket_name",
Key: name, // The name of the file
}, function(err, data) {
if (err) {
response.sendStatus(500)
} else {
response.sendStatus(200)
}
});
})
```
> **Note:** This is for demo purposes only. When used in production, make sure you validate the file before uploading (name, file size, file type, ...). I've added a comment in the code below where you should validation and security checks.
### List all the files
You may want to show all uploaded files (e.g. inside a media browser), so let's also implement the route to list all files inside the bucket. For this demo, I'll just return the full result from the S3 API as JSON, but you can do whatever you want with it.
```js
// Show all files
app.get("/list", function(request, response) {
// Get all objects inside the bucket
s3.listObjects({
Bucket: "bucket_name",
}, function (err, data) {
if (err) {
response.sendStatus(500)
} else {
// Return the list ("Contents") as JSON
response.json(data.Contents)
}
})
})
```

## Full Code
```js
const express = require("express")
const AWS = require("aws-sdk")
const fileUpload = require('express-fileupload')
const app = express()
// Connect to S3
const s3 = new AWS.S3({
endpoint: `contabo_storage_bucket_url`, // e.g. https://eu2.contabostorage.com/bucketname
accessKeyId: "your_access_key_here",
secretAccessKey: "your_secret_key_here",
s3BucketEndpoint: true,
});
// Middleware to handle incoming files
app.use(fileUpload({
createParentPath: true
}))
// Show the form
app.get("/", function(request, response) {
response.sendFile(__dirname + "/form.html")
})
// Handle files
app.post("/upload", function(request, response) {
const file = request?.files?.["fileToUpload"] || null
// Return if the request doesn't contain the file
if(!file) return response.sendStatus(400)
// Destructure the content of the file object
const { name, mimetype, size, data } = file
const fileContent = Buffer.from(data, ' ');
/* Add security checks (e.g. max size) here */
s3.putObject({
Body: fileContent,
Bucket: "your_bucket",
Key: name,
}, function(err, data) {
console.log(err, data)
if (err) {
response.sendStatus(500)
} else {
response.sendStatus(200)
}
});
})
// Show all files
app.get("/list", function(request, response) {
// Get all objects inside the bucket
s3.listObjects({
Bucket: "your_bucket",
}, function (err, data) {
if (err) {
response.sendStatus(500)
} else {
// Return the list ("Contents") as JSON
response.json(data.Contents)
}
})
})
app.listen(4000, function() {
console.log("🚀 App is running on http://localhost:4000")
})
```
---
## Python3 and Flask
```python
from flask import Flask, render_template, request # pip install flask
import boto3 # pip install boto3
import os
from werkzeug.utils import secure_filename
app = Flask(__name__)
session = boto3.session.Session()
client = session.client('s3',
region_name='eu2',
# e.g. https://eu2.contabostorage.com
endpoint_url='contabo_storage_bucket_url',
aws_access_key_id='your_access_key_here',
aws_secret_access_key='your_secret_key_here')
@app.route('/')
def show_form():
return render_template('form.html') # located in templates/form.html
@app.route('/upload', methods=['POST'])
def handle_upload():
f = request.files['fileToUpload'] # Get the file
filename = secure_filename(f.filename)
f.save(filename) # Save the file temporarily
client.upload_file(filename, # Path to local file
'your_bucket', # Bucket name
filename) # Name for remote file
os.remove(filename) # Remove the file after uploading
return 'Done!'
if __name__ == '__main__':
app.run(debug=True)
```
---
And that's it - now you know how to upload files to your Contabo Object Storage! 🥳
Thank you very much for reading and don't forget to follow me [on Twitter @EinLinuus](https://twitter.com/EinLinuus) and also [here on Hashnode](https://hashnode.com/@EinLinuus) and get notified everytime I publish a new post. 🙌
Have a nice day 🚀👋